To change the extrusion parameters the geometry model properties windows should be displayed on the screen. If it is hidden, to make it visible you need to click by the left mouse button at any place within the model window, and then select Properties in the View menu.
To change the extrusion parameters for one or more objects, you need to select them. In the model
properties window the group Selection will be displayed showing all the types of selected objects
(vertices, edges and/or blocks). The group Levels will be added to the properties of
the selected objects of maximum dimension. Group Levels includes heights of all levels, assigned to at
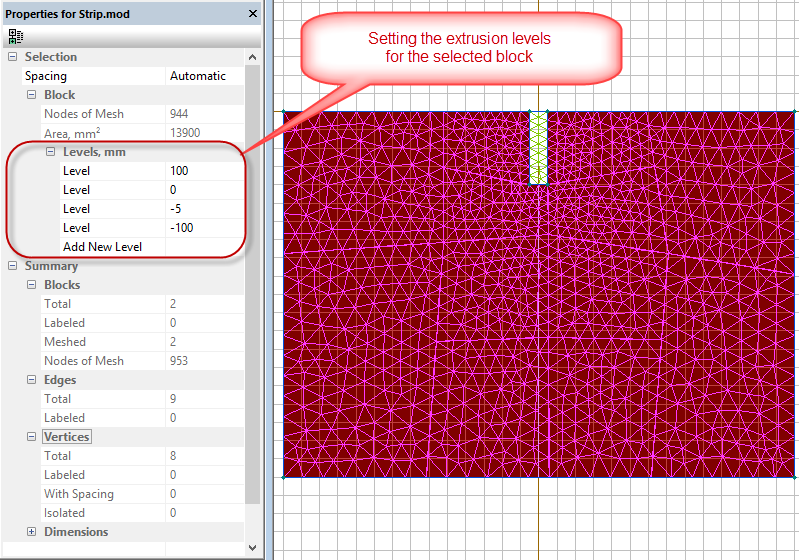
least one of the selected objects, and additional element Add New Level.
Levels are always arranged with the highest value on top.
Pic. Selected block in the 2D model and 3D problem properties window.
Three types of actions may be performed with the levels:
Note: In some cases it is impossible to remove or change the level because it is protected. This happens if the level is assigned
to the object of higher dimension. For example, if the level was automatically assigned to the vertex after being set for the edge
or block which include this vertex, than it may be removed or changed for this vertex only together with the same action performed
for the edge or block.
This change is possible only for the object which has the maximum dimension between all the neighbors
(dimension of the block is 2, edge is 1 and vertex is 0). In this case the change is automatically transferred to its entire boundary.
For example, if the level was assigned to the edge and was automatically spread out to its end vertices, then it may be changed only
for the edge, but this change will be automatically spread to its vertices.
Related Topic:
Model 3D Creating
Model Heights
Model View 3D
Model Assign Labels