Control the Picture in a 3D View: Rotate, Pan, Zoom
Following actions provide the full information about 3D models:
- Look at the model from any direction (rotation);
- Move the model along the screen surface (panning);
- Increase and decrease the model scale (zooming);
- Hide the parts of the model (hiding) to see the objects behind;
- Select the model elements: bodies, faces, edges, vertices;
Majority of these actions may be performed by moving the mouse cursor while left or right mouse button is pressed. For some actions one or more keyboard keys should be pressed before moving the mouse.
We will call the mouse move left or right according to what mouse has been pressed during the move.


Mouse movements listed above allow full control over the zoom level and camera position relating the model.
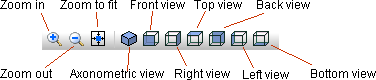
In conclusion here is the list of all methods of the image zoom control:
- Mouse wheel rotation increases the zoom level in front direction or decreases the level with backward direction. Screen position of the model point under the mouse cursor stays intact.
- After pressing the toolbar Zoom in button
 you may click by the mouse in the model to increase the zoom level twice, or by moving the mouse with left button pressed you may draw the rectangle on the screen, which will be stretched to occupy the full window when the mouse button is released.
 - Pressing the Zoom out button
 undo the last zoom increase. If there is nothing to undo the zoom level will be decreased twice.
 - Zoom to fit button
 sets the zoom level necessary to fit the full model into the window.
 - Mouse movement with the left button and keys SHIFT+CTRL pressed increases the zoom level if directed up, or decreases it if directed down
- Shortcuts:
Ctrl+ + (keys CTRL and plus) increases the zoom level twice;
Ctrl+ - (keys CTRL and minus) decreases the zoom level twice;
Ctrl+ 0 (keys CTRL and zero) scales the window to fit the full model.
Related Topic:
Creating 3D Model
Manipulation with 3D Image
Hidden and Transparent Bodies